TL;DR:
- Getting your freight class wrong can lead to significant reclassification fees and inflated shipping costs. Accurately calculating freight class based on density, measurement, and packaging can help ecommerce sellers control expenses and negotiate better rates. Consistent measurement, documentation, and monitoring of freight classification are essential for reducing costly mistakes and optimizing shipping efficiency.
Getting your freight class wrong is one of the most expensive mistakes you can make in LTL shipping. Choosing freight classes accurately determines how carriers price your shipment, and a single error can turn a $200 shipping quote into a $2,000 bill after reclassification fees hit. The National Motor Freight Classification system governs how every LTL shipment in the U.S. gets priced, yet most ecommerce sellers treat it as an afterthought. This guide walks you through exactly how to figure freight class, avoid the most common pitfalls, and use classification as a real cost control tool.
Table of Contents
- Key takeaways
- Choosing freight classes: what actually determines them
- How to calculate freight class accurately
- Common mistakes that lead to reclassification
- Real ecommerce examples: freight class in action
- My take on freight class selection
- How Or-ner helps you get freight classification right
- FAQ
Key takeaways
| Point | Details |
|---|---|
| Density drives class | Freight class is primarily determined by density, so accurate weight and dimension measurements are non-negotiable. |
| 18 classes, real money | The NMFC system spans Class 50 to Class 500, and moving one class up can significantly increase your shipping rate. |
| Misclassification is costly | Incorrect declarations trigger reclassification fees of $25 to $150 per shipment, plus higher freight bills. |
| Packaging changes your class | How you package and consolidate goods directly affects density and can shift you to a more favorable class. |
| Document everything | Consistent measurement records and shipment labels protect you in carrier disputes and billing reviews. |
Choosing freight classes: what actually determines them
Freight class is not arbitrary. The NMFC system assigns 18 classes ranging from Class 50 at the low end to Class 500 at the high end. Class 50 covers the densest, most easily handled freight and carries the lowest rates. Class 500 covers the least dense, most fragile, or highest-liability goods and commands the steepest rates.
Four factors drive freight class determination: density, stowability, handling, and liability. Density is the dominant one. The other three come into play for specialty goods, but for the vast majority of ecommerce shipments, density is the primary driver and everything else is secondary.
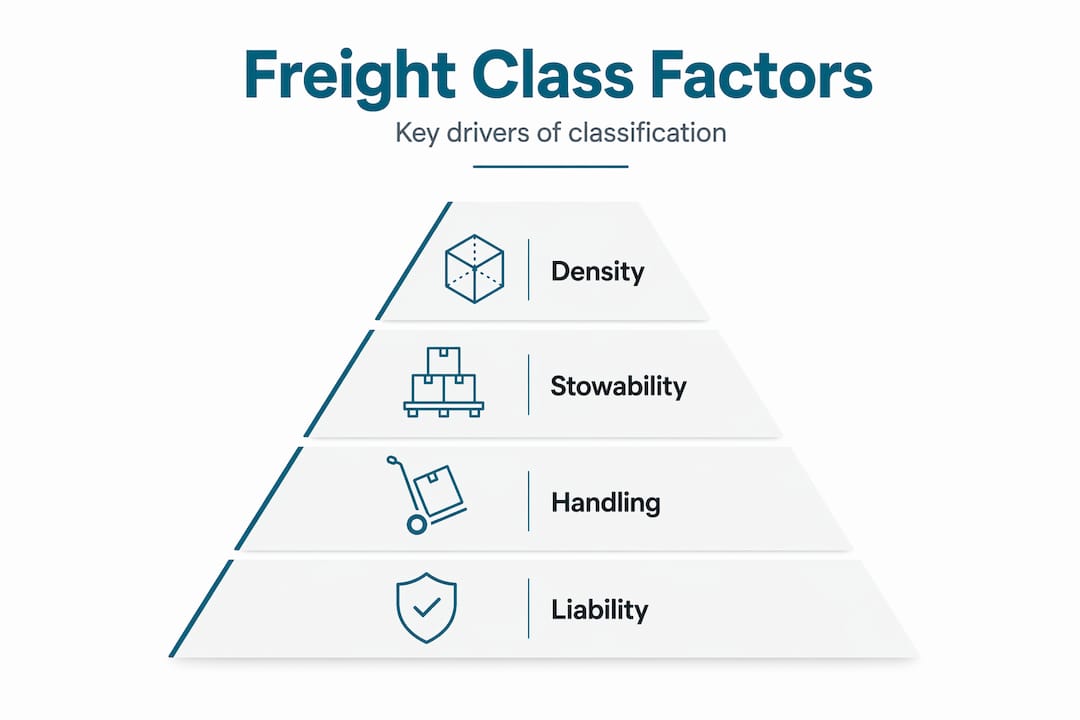
Here is how those factors break down in practice:
Density is the weight of your shipment per cubic foot. Heavy, compact goods score low class numbers and low rates. Light, bulky goods score high class numbers and high rates.
Stowability refers to how easily a carrier can stack or fit your freight in a trailer alongside other shipments. Oddly shaped items or hazardous goods that cannot be stacked add cost.
Handling covers how much extra labor your shipment requires. Fragile items, unusual dimensions, or goods requiring special equipment get flagged here.
Liability reflects the risk of damage or theft. High-value goods in relation to their weight, or items prone to damage, push the class higher.
The table below gives you a practical reference for the most common freight classes:
| Freight class | Density (lbs per cubic ft) | Common ecommerce examples |
|---|---|---|
| Class 50 | Over 50 | Hardware, bolts, cast iron parts |
| Class 85 | 12 to 15 | Crated machinery, motors |
| Class 100 | 9 to 11 | Boat covers, car parts |
| Class 125 | 7 to 8 | Small appliances, auto glass |
| Class 150 | 6 to 7 | Auto sheet metal, assembled furniture |
| Class 250 | 2 to 3 | Bamboo furniture, unassembled shelving |
| Class 400 | 1 to 2 | Deer antlers, ping pong balls |
| Class 500 | Under 1 | Bags of gold dust, low-density foam |
Understanding where your products land on this table is the first real step toward freight class selection that saves you money.
How to calculate freight class accurately
The math is straightforward once you have good measurements. Here is the step-by-step process to calculate freight class for any LTL shipment.
- Measure your shipment dimensions. Use the longest, widest, and tallest points of your packaged freight, including any pallet. Measure in inches.
- Calculate cubic inches. Multiply length × width × height.
- Convert to cubic feet. Divide the total by 1,728 (the number of cubic inches in one cubic foot).
- Calculate density. Divide the shipment’s total weight in pounds by the cubic footage you just calculated.
- Match density to a freight class. Use the density ranges in the NMFC table or a freight class calculator to find your class.
For example: a shipment measuring 48" × 40" × 48" on a pallet and weighing 500 lbs works out like this. Cubic inches: 48 × 40 × 48 = 92,160. Cubic feet: 92,160 ÷ 1,728 = 53.3 cubic feet. Density: 500 ÷ 53.3 = 9.38 lbs per cubic foot. That density puts you solidly in Class 100 territory.
Pro Tip: Always measure to the outermost point of the freight, including any overhang or irregular protrusions. Carriers remeasure at the dock using dimensioning equipment, and if your declared dimensions are even slightly off, you will face a reclassification fee and a corrected invoice.

One area where density alone does not tell the full story: specialty goods. Electronics with high declared values may be bumped to a higher liability class regardless of density. Hazardous materials have stowability restrictions that override density calculations. For most apparel, home goods, and general merchandise shipments, though, the density formula gives you the right answer.
Pro Tip: Weigh your shipment after it is fully packaged and palletized. Sellers frequently declare the product weight and forget to add the pallet (roughly 40 to 70 lbs) and packaging materials. That gap is where data drift starts.
You can also find your freight class by searching the NMFC item number for your specific commodity type in the official NMFC directory. This is worth doing for any new product category you start shipping.
Common mistakes that lead to reclassification
Reclassification is not just a billing annoyance. Fees run between $25 and $150 per shipment, and for high-volume sellers, even a 5% reclassification rate across your shipments adds up to a serious recurring cost. Here are the mistakes that cause it most often.
- Declaring dimensions without including the pallet. The carrier measures the full loaded pallet. If your declared dimensions only reflect the product box, the carrier’s dimensioner will catch the difference immediately.
- Using rounded or estimated weights. Approximating weight to the nearest 50 lbs might seem harmless, but even small discrepancies shift density calculations and push shipments into a higher class.
- Ignoring handling and liability flags. Sellers shipping fragile electronics or high-value goods sometimes declare the density-based class without accounting for liability. The carrier disagrees at delivery and charges accordingly.
- Inconsistent packaging across shipments. If you change your packaging dimensions or add protective materials between shipments, your freight class should be recalculated. Many sellers set a class once and never revisit it.
- Skipping shipment documentation. Without photos, weight tickets, and dimension records at the time of shipping, you have no evidence to dispute a carrier’s reclassification claim.
“Consistent pallet and packaging measurement discipline reduces reclassification risk significantly.” This is the core finding from LTL dimensioning research, and it reinforces something experienced shippers already know: the discipline happens before the shipment leaves your dock, not after.
The good news is that these mistakes are fixable with process, not technology. A simple measurement checklist at your packing station eliminates the most common errors. Or-ner’s freight booking checklist is one resource that walks ecommerce sellers through exactly what to capture before a shipment goes out.
Real ecommerce examples: freight class in action
Theory only takes you so far. Here is how freight class plays out across three product categories that ecommerce sellers ship regularly.
Electronics tend to be dense relative to their size, which works in your favor. A boxed laptop or a bundled cable accessory kit will typically land in Class 85 to Class 100. Protecting electronics from damage is where liability becomes a factor. If your declared value is high relative to weight, some carriers will reclassify upward regardless of density.
Apparel ships at lower densities than electronics but is generally compressible, easy to handle, and low liability. Well-packed apparel in standard cartons usually falls in Class 100 to Class 125. The key variable is whether you are shipping loose garments in poly bags versus folded items in rigid boxes.
Furniture is where freight class selection gets expensive fast. Furniture typically falls in Class 150 to Class 250 because assembled pieces are bulky and low density. Shipping disassembled furniture changes the equation completely. Flat-packed shelving units have a much higher density than the same product assembled, which can drop you two or three class levels.
The table below shows how packaging choices shift freight class and cost for a common scenario:
| Scenario | Density (lbs/cu ft) | Freight class | Relative cost |
|---|---|---|---|
| Assembled bookshelf | 2.1 | Class 250 | High |
| Flat-packed bookshelf | 6.8 | Class 150 | Moderate |
| Flat-packed, two units per pallet | 9.4 | Class 100 | Low |
| Boxed hardware kit | 18.0 | Class 70 | Very low |
Consolidating shipments is another lever. Higher-density shipments fill trailer weight limits before filling space, so carriers price them lower. When you combine multiple smaller, lower-density items onto a single pallet, the blended density often qualifies for a better class than any individual item would.
Pro Tip: If you regularly ship large items for ecommerce, review the best practices for large item shipping to find consolidation strategies that reduce your class before quoting.
My take on freight class selection
I have worked with enough ecommerce sellers to know that most freight classification problems are not technical failures. They are process failures. I have seen brands lose thousands of dollars annually because they set a freight class when they first started shipping a product and never looked at it again, even as their packaging changed, their supplier switched materials, and their pallet configuration evolved.
What I have found is that the sellers who handle this well treat freight class like a product spec. They track it, they update it when packaging changes, and they check actual carrier invoices against declared classes on a monthly basis. That monthly reconciliation step catches reclassification errors quickly, before they compound.
The other thing that often gets overlooked is the conversation with the carrier. Most shippers treat freight class as something the carrier imposes on them. It is not. You can negotiate class-based pricing agreements with carriers if you have consistent volume and accurate data. I have seen sellers reduce their effective LTL rate by 15 to 20% simply by coming to that negotiation with clean measurement records and a history of accurate declarations.
Freight class selection is not a regulatory headache. It is a cost control lever. The sellers who treat it that way are the ones who stop being surprised by their freight invoices.
— Maayan
How Or-ner helps you get freight classification right
Misclassifying freight is a cost problem that compounds quickly, and having the right tools and expertise behind you makes a measurable difference.
Or-ner gives ecommerce sellers and logistics teams a freight booking platform built around accuracy and cost visibility. From the step-by-step freight booking guide that walks you through classification inputs to reliable courier services for last-mile and regional fulfillment, Or-ner brings together the tools you need to ship accurately and confidently. Whether you are moving apparel, furniture, or electronics, Or-ner’s platform helps you capture the right dimensional data, select the correct class, and avoid the reclassification fees that quietly drain your margins.
FAQ
What is freight class and why does it affect shipping cost?
Freight class is a standardized rating system with 18 levels from Class 50 to Class 500 that LTL carriers use to price shipments. Higher classes mean higher rates, and the class is determined primarily by density along with stowability, handling, and liability.
How do I figure freight class for my shipment?
Divide your shipment’s weight in pounds by its volume in cubic feet. Volume equals length times width times height in inches, divided by 1,728. Match the resulting density to the corresponding NMFC freight class range.
What happens if I declare the wrong freight class?
Carriers remeasure and reweigh freight at the dock. If your declared class does not match their measurement, you will receive a reclassification notice with additional fees ranging from $25 to $150, plus the corrected higher rate for the shipment.
Can packaging really change my freight class?
Yes. Denser packaging, flat-packing assembled goods, or consolidating multiple items onto one pallet all increase density. Higher density shifts your shipment to a lower, cheaper freight class.
Is there a difference between freight class and NMFC number?
They are related but distinct. The NMFC number identifies a specific commodity in the National Motor Freight Classification directory. The freight class is the pricing tier assigned to that commodity, typically based on its density and other shipping characteristics.