
TL;DR:
- Effective product photography boosts conversion rates by showcasing products in consistent, high-quality images that attract shoppers. Proper lighting, composition, and platform compliance are essential to create authentic visuals that reduce returns and build trust. Maintaining a repeatable system for shoots and edits ensures brand consistency and long-term sales growth.
Product photography is the visual representation of your product as a substitute for the in-store experience, and getting it right is the single most direct lever you have on conversion rates. Listings with 7 or more images convert 2.4 times better than single-image listings. High-quality visuals can lift conversions by up to 33%. These numbers are not marginal. They mean the difference between a product that sells and one that sits. Whether you are shooting with a smartphone or a DSLR, the product photography tips in this article will help you build a system that produces consistent, conversion-ready images for every listing you publish.
What equipment do you need for effective product photography?
The right gear does not have to be expensive. Modern smartphones rival entry-level DSLRs for most product categories. The real differentiators are lighting and composition, not the camera body. A DSLR justifies the investment only when extreme macro detail is required, such as jewelry or fine electronics.
Core gear for beginner product photography
- Camera: Any recent smartphone or DSLR with at least 6 megapixels. Most flagship phones from the past three years exceed this comfortably.
- Tripod: Non-negotiable. A tripod eliminates camera shake and keeps framing identical across every shot in a catalog.
- Lighting: Two continuous LED panels with diffusers, or a large north-facing window for natural light. Avoid mixing light sources.
- Backdrop: Pure white seamless paper or a white foam board for main images. Textured or lifestyle backdrops for secondary shots.
- Reflector: A $15 collapsible reflector fills shadows on the opposite side of your key light without adding a second power source.
Pro Tip: Shoot in RAW format if your camera supports it. RAW files preserve far more color and exposure data than JPEG, giving you much more room to correct white balance and exposure in post without degrading image quality.
| Setting | Recommended value | Why it matters |
|---|---|---|
| Resolution | 6 MP minimum | Supports zoom and cropping |
| Format | RAW or max JPEG | Preserves editing flexibility |
| ISO | 100–200 | Minimizes digital noise |
| Aperture | f/8–f/11 | Keeps full product in focus |
| White balance | Manual or Kelvin | Prevents unwanted color casts |
How do you compose and light your product shots?
Lighting is the single variable that separates amateur product shots from professional ones. A two-light LED setup with softboxes placed at 45-degree angles on either side of the product produces even, shadow-free illumination that works for almost every product category. Add a white foam reflector opposite your key light to fill any remaining shadows.

Color temperature consistency matters as much as brightness. Mixing a warm tungsten bulb with a cool LED creates a color cast that no amount of post-processing fully corrects. Set all lights to the same Kelvin value, typically 5,500K for a daylight-neutral look, and lock your camera’s white balance to match.
Composition rules that improve every shot
- Fill the frame. Your product should occupy 80–85% of the frame in the main hero image. Excessive negative space reads as unprofessional and reduces detail at thumbnail size.
- Shoot multiple angles. Capture front, back, side, top, and any detail shots that show texture, labels, or hardware. Shoppers need to feel they have handled the product.
- Add a scale reference. Place a common object, a hand, a coin, or a ruler, in at least one shot. Accurate scale references reduce returns by 22% by setting correct size expectations before purchase.
- Use a consistent camera height. Shooting every product at the same angle and height makes your catalog look deliberate and professional rather than assembled from random sessions.
- Avoid harsh reflections. Glossy products like bottles or electronics need diffusion panels placed close to the product surface to eliminate specular hotspots.
Pro Tip: Before you finalize any shot, zoom your editing screen out to thumbnail size. If product features blur or disappear at that scale, the composition needs adjustment. Mobile shoppers see thumbnails first, and a confusing thumbnail loses the click entirely.
Strong visual content in marketing consistently outperforms text-only listings across every major ecommerce platform. Composition and lighting are where that advantage is built, not in post-processing.
What are the best practices for editing and platform compliance?
Editing is not about making your product look better than it is. It is about making it look exactly as it is, under ideal conditions. Over-editing and unrealistic AI texture enhancements undermine shopper trust and increase return rates. Authenticity and polish must coexist.
Platform image requirements
- Amazon main images require a pure white background at RGB 255, 255, 255 with no props, text, or watermarks. The product must fill at least 85% of the frame.
- Shopify recommends a minimum of 2048×2048 pixels to support zoom functionality.
- Etsy requires images at least 2,700 pixels wide for full-resolution zoom.
- Minimum safe size across most platforms is 1,000 pixels on the shortest side.
Exporting at 80–85% JPEG quality reduces file size by 60–70% without visible image degradation. Smaller files load faster, and page speed directly affects both SEO rankings and conversion rates. WebP format offers similar compression with slightly better quality retention for platforms that support it.
| Platform | Min. image size | Background requirement | Zoom support size |
|---|---|---|---|
| Amazon | 1,000 px shortest side | RGB 255,255,255 white | 1,600 px+ |
| Shopify | 800 px | Flexible | 2,048 px recommended |
| Etsy | 2,000 px | Flexible | 2,700 px wide |
| eBay | 500 px | White preferred | 1,600 px recommended |
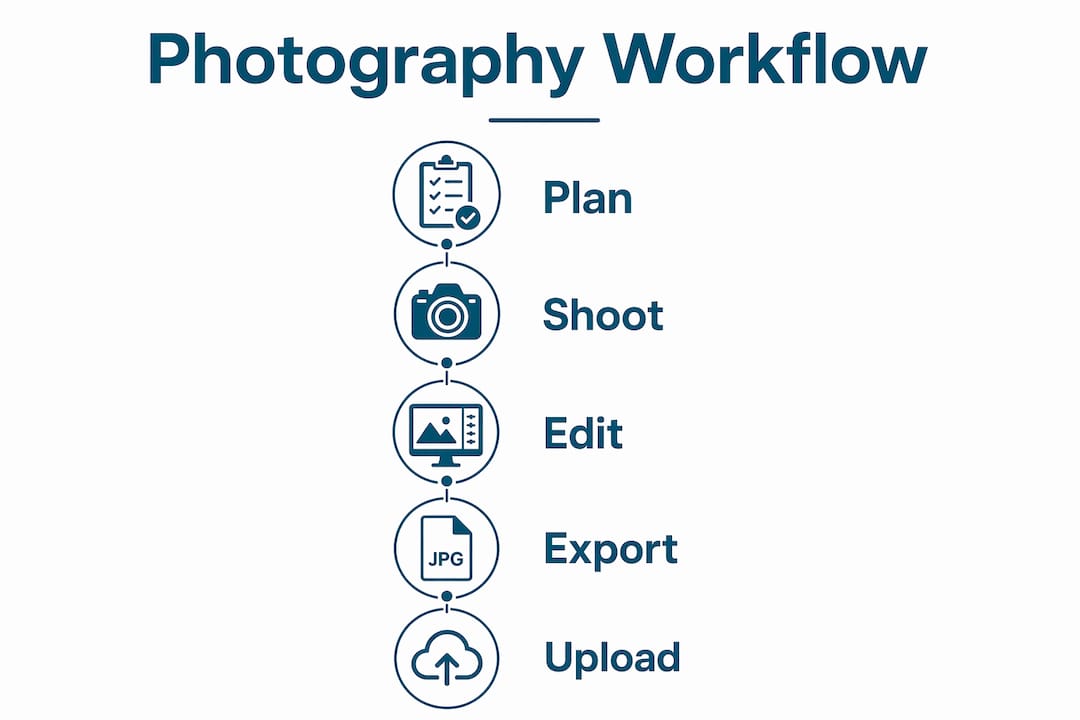
Add descriptive, keyword-rich filenames before you upload. A file named “blue-ceramic-mug-12oz-front.jpg” performs better in image search than “IMG_4823.jpg.” Write alt text that describes the product accurately, including color, material, and size where relevant. Batch-edit using presets in Lightroom or Capture One to maintain consistent color grading, exposure, and contrast across your entire catalog.
How many product images should you include?
The minimum effective image set for any ecommerce listing is five images. The recommended range is 5–8, covering hero, detail, scale, lifestyle, and variant shots. Going below five leaves shoppers without enough visual information to feel confident. Going above eight without a clear purpose creates noise rather than clarity.
Lifestyle images boost conversions by 15–30% compared to white-background-only listings. They show the product in context, which helps shoppers visualize ownership. A lifestyle shot of a ceramic mug on a morning kitchen counter communicates far more than a white-background front view alone.
360-degree spins and multi-angle slideshows can lift conversions by up to 65% in certain categories, particularly apparel, footwear, and furniture. Product videos boost conversions by over 80% and are especially effective for products with moving parts, assembly requirements, or tactile qualities that static images cannot convey.
The right image mix for most sellers looks like this:
- Hero shot: Clean white background, product centered, 85% frame fill
- Detail shots: Close-ups of texture, labels, stitching, hardware, or finish
- Scale shot: Product shown next to a hand or common object
- Lifestyle shot: Product in a realistic use environment
- Variant shots: Each color, size, or configuration shown separately
Balance quantity with quality. Five excellent images outperform twelve mediocre ones every time.
What common mistakes hurt product photography results?
Inconsistent lighting and framing across a catalog is the most common and most damaging mistake ecommerce sellers make. Visual consistency across listings builds subconscious trust. When images look like they were shot in different rooms on different days, shoppers read it as a lack of professionalism, even if they cannot articulate why.
- Over-editing: Removing all shadows, boosting saturation beyond reality, or using AI tools to add textures that do not exist on the actual product creates a gap between expectation and delivery. That gap drives returns.
- Single-image listings: One image is never enough. Shoppers need multiple angles to feel confident, especially on mobile where they cannot zoom easily.
- Thumbnail blindness: A beautiful full-size image that becomes an unreadable blur at 200 pixels wide loses clicks before the listing is ever opened.
- Color inaccuracy: If your red product photographs as orange, you will receive returns and negative reviews regardless of how good the copy is. Calibrate your monitor and proof colors against the physical product before publishing.
Pro Tip: Manage your shoots as a repeatable system. Schedule monthly or quarterly batch shoots, use the same lighting positions, and save editing presets. Consistency across a growing catalog is a brand signal that individual great shots cannot replicate.
Key takeaways
Strong product photography requires consistent lighting, platform-compliant specs, and a minimum of five image types per listing to build shopper trust and reduce returns.
| Point | Details |
|---|---|
| Image quantity drives conversions | Listings with 7+ images convert 2.4x better than single-image listings. |
| Lighting is the top differentiator | A two-light LED setup at 45-degree angles produces professional results on any budget. |
| Platform specs are non-negotiable | Amazon requires RGB 255,255,255 white; Shopify recommends 2,048×2,048 pixels minimum. |
| Lifestyle images lift sales | Lifestyle shots boost conversions 15–30% over white-background-only listings. |
| Consistency builds brand trust | Uniform lighting, framing, and color treatment across a catalog signals professionalism. |
What I’ve learned about product photography after years of watching sellers get it wrong
Most ecommerce sellers treat product photography as a one-time task. Shoot the product, upload the images, move on. That mindset is exactly why so many catalogs look inconsistent six months after launch.
Photography for ecommerce is a system, not a moment. The sellers I have seen consistently outperform their categories are the ones who treat their shoot setup like a production line. Same backdrop position, same light placement, same camera height, same editing preset. Every time. That discipline is what makes a 200-SKU catalog look like it was shot by the same person on the same day, because it was.
The authenticity question trips people up more than any technical issue. There is real pressure to make products look aspirational, and AI editing tools make it dangerously easy to cross the line from “best light” into “false representation.” I have watched sellers boost their click-through rates with heavily edited images, only to see their return rates climb in parallel. The math never works out in their favor. Accurate images, shot well, with honest color and realistic scale, reduce returns and build the kind of repeat-purchase trust that compounds over time.
Test your images. Run A/B tests on your hero shots. Swap a white-background image for a lifestyle version and measure the conversion lift over two weeks. The data will tell you more than any general advice can. Photography is the one area of ecommerce where a small investment in getting it right pays back faster than almost anything else in your operation. For sellers managing brand packaging for logistics, visual consistency extends beyond the listing page and into the unboxing experience, which is its own conversion moment.
— Maayan
When great images meet reliable delivery

Strong product photography gets shoppers to click “buy.” What happens next determines whether they come back. Or-ner’s global logistics platform connects ecommerce sellers to reliable courier services, real-time shipment tracking, and cross-border fulfillment across every major market. When your product arrives exactly as pictured and on time, the entire purchase experience reinforces the trust your images built. Or-ner handles freight booking, customs clearance, warehousing, and last-mile delivery so you can focus on the catalog. Sellers who invest in great visuals deserve a logistics partner that delivers on the promise those visuals make.
FAQ
How many images does a product listing need?
The recommended minimum is 5–8 images per listing, covering hero, detail, scale, lifestyle, and variant shots. Listings with 7 or more images convert 2.4 times better than single-image listings.
What background is required for Amazon main images?
Amazon requires a pure white background at RGB 255, 255, 255 with no props, text, or watermarks. The product must fill at least 85% of the frame.
What is the best lighting setup for beginner product photography?
Two continuous LED panels with softboxes placed at 45-degree angles on either side of the product produce even, professional results. A white foam reflector opposite the key light fills shadows without adding a second powered light.
Does image quality actually affect return rates?
Accurate product photos with scale references reduce returns by 22%. Inaccurate or over-edited images create a gap between shopper expectation and the delivered product, which drives returns and negative reviews.
What file format and size should I export product images in?
Export at 80–85% JPEG quality or use WebP format. This reduces file size by 60–70% without visible quality loss. Aim for files under 200KB and a minimum resolution of 1,000 pixels on the shortest side, with 2,048×2,048 pixels preferred for zoom support.